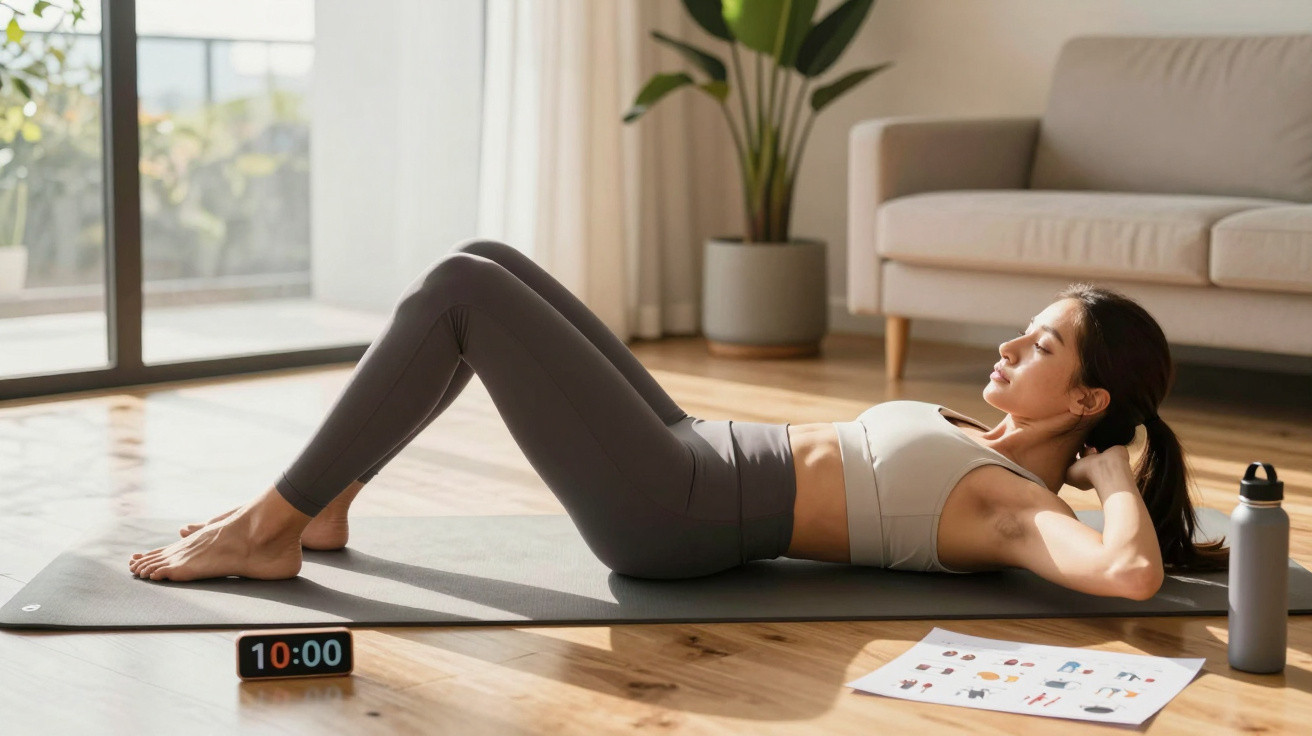
Many people struggle with this exact issue: the lower abdominal area can look soft, even when they are already doing plenty of crunches. The reason is that conventional sit-ups only work the lower abs and deep-lying muscles to a limited extent. A targeted, Pilates-inspired 10-minute workout at home can deliver far more here – provided your technique and breathing are right.
Why the lower abs are so stubborn
The lower abs are often seen as a problem area because fat stores tend to accumulate there, while the deep muscles in this region are rarely challenged in everyday life. Long periods of sitting, constant bending forwards and too little full-body movement can cause these muscles to become “inactive”.
A short, precise training stimulus for the lower abs is often more effective than endless sets of traditional crunches.
This workout addresses exactly that: calm, controlled movements that activate the lower abs and deep core muscles. As an added benefit, it supports the lumbar spine and improves posture.
How the 10-minute lower abs workout is structured
The plan includes 10 exercises. Each work interval lasts 45 seconds, followed by 15 seconds of rest. The workout is performed at a fairly slow pace, with complete focus on technique and core tension.
An overview of the 10 exercises
- Lowering the legs while lying on your back with bent knees – Keep your feet together and knees slightly apart. Your lower back stays firmly pressed into the mat and your abs remain engaged.
- Alternately straightening the legs and lifting the hips – Lying on your back, extend your legs just above the floor, then lift and lower your hips in a controlled way. Do not use momentum; rely only on muscular effort.
- Lowering and extending one leg while lying on your back – With your core firmly braced, lower and extend one leg at a time. Keep your lower back in continuous contact with the mat.
- Seated upper-body pulses with bent legs – Lean your torso slightly back, brace your abs and make small pulsing movements. Keep your shoulders lowered and draw your shoulder blades back.
- Leaning the upper body back and extending the legs into a straddle – From a seated position with bent legs, lean back and straighten your legs out into a straddle. Put as little weight as possible through your heels; the effort should come from your core.
- Large vertical scissor movements with the legs – Lie on your back with your upper body supported on your forearms. Move your legs in large alternating scissor actions up and down without placing your heels on the floor.
- Extending the legs at a 45-degree angle and opening the thighs sideways – Again supported on your forearms, hold your straight legs in the air. Open and close your thighs while keeping your upper body steady.
- Alternately extending the legs above the floor with raised shoulders – Lie on your back with your head and shoulders slightly lifted. Extend one leg at a time just above the floor. An easier option is to keep one leg slightly bent.
- Lifting the hips and alternately lowering bent legs – While lying on your back, raise your hips and slowly lower the bent legs towards the floor one after the other.
- Horizontal scissors while raising and lowering the legs – Move your legs sideways in a scissor motion while also lifting and lowering them. Keep your lower back firmly against the mat.
With 45 seconds of work and 15 seconds of rest for each exercise, the session totals almost exactly 10 minutes. Nothing more is needed – as long as every second is performed with proper form.
The right technique: slow, precise and breathing
Results depend entirely on execution. This training plan relies on slow, controlled movements. Rushing reduces its effectiveness, places strain on the back and often leads to compensatory movement through the hips or neck.
As you exhale, the abs contract most strongly – use that precise moment for the hardest part of the movement.
Follow three straightforward rules:
- Exhale during the effort phase – for example, as your legs move towards the floor or when you lift your hips.
- Keep your lower back in contact with the mat – this protects the lumbar spine and makes your abs take on the work.
- No momentum and no pulling – every repetition should feel as though it is performed in slow motion: begin gently and finish with control.
Holding your breath may briefly tighten your abs, but it also creates unnecessary pressure in the head and can disrupt your circulation. A calm, rhythmic breathing pattern is the better approach.
How often to train – and when will you see results?
Three sessions per week are recommended, with at least one rest day between them. Your muscles need this break to recover and return stronger.
Beginners can easily modify the format:
- reduce the work interval to 30 seconds
- extend rests to 30 seconds
- if needed, take a slightly longer break after five exercises before continuing
After a few weeks, you can return to 45 seconds of work and 15 seconds of rest. If you then want to progress further, complete two rounds in succession, allowing two to three minutes of recovery between them.
Fat loss: what the workout does – and does not do
This plan primarily trains the lower abdominal muscles and deep core muscles. In other words, it shapes, tones and stabilises, but on its own it will not burn a significant amount of belly fat.
The lower abs become visible when strong muscles meet a moderate body-fat percentage – training and everyday habits need to work together.
To noticeably reduce belly fat, you need:
- a moderate calorie deficit through your diet
- regular cardiovascular exercise, such as brisk walking, jogging or cycling
- more movement in daily life: taking the stairs, walking short journeys and having brief stretching breaks at your desk
When combined, results can usually be noticed after four to six weeks: a firmer waist, better body awareness and less of a feeling of “heaviness” around the stomach.
Why focusing on the deep muscles makes such a difference
The 10-minute plan closely follows Pilates principles: centring, control and flowing breathing. Its aim is not merely a flatter stomach, but a more stable core as well. This is more useful in daily life than many people realise.
Strong lower abs and well-developed deep muscles:
- reduce pressure on the lumbar spine when lifting and carrying
- improve posture when sitting and standing
- provide greater control during rapid changes of direction in sport
- lower the risk of back pain
People who spend a great deal of time at a desk benefit especially strongly. The typical excessive inward curve of the lower back is reduced, while the front of the torso once again takes on more of its stabilising role.
Practical tips for making the workout at home work
A little preparation helps ensure those 10 minutes do not become uncomfortable for your back. A soft mat, some space and a timer are enough, but a few details can make a real difference.
| Tip | Benefit |
|---|---|
| Warm up briefly, for example with 2 minutes of marching or jumping jacks | Prepares the circulation and joints, reducing the risk of injury |
| Place a towel beneath your head | Relieves the neck and supports a neutral head position |
| Keep your gaze slightly towards the ceiling rather than at your knees | Protects the cervical spine and reduces tension |
| Deliberately engage your abs before every repetition | Specifically activates the lower abs and keeps the back stable |
| Back pain? Reduce the range of movement | Allows you to continue the exercise without overloading the spine |
Who should be careful – and how to adapt the workout
People with acute back problems, slipped discs, those who have recently given birth, or anyone with pelvic floor complaints should first discuss this plan with a doctor or physiotherapist.
Typical adjustments may include:
- lowering the legs by a smaller amount to shorten the lever
- using the forearms for support more often
- taking more pressure off the cervical spine by keeping the head on the mat
- performing only 6 to 8 exercises instead of all 10, with better technique
If you are unsure, record your movements from the side using your smartphone. This will quickly show whether your lower back arches away from the mat at any point – a clear sign that you should reduce the movement range or bend your legs more.
Combined with calm breathing, a little patience and a reasonably sensible diet, this 10-minute plan can be the starting point for turning the lower abs from the most stubborn problem area into a source of strength, step by step.














Comments
No comments yet. Be the first to comment!
Leave a Comment