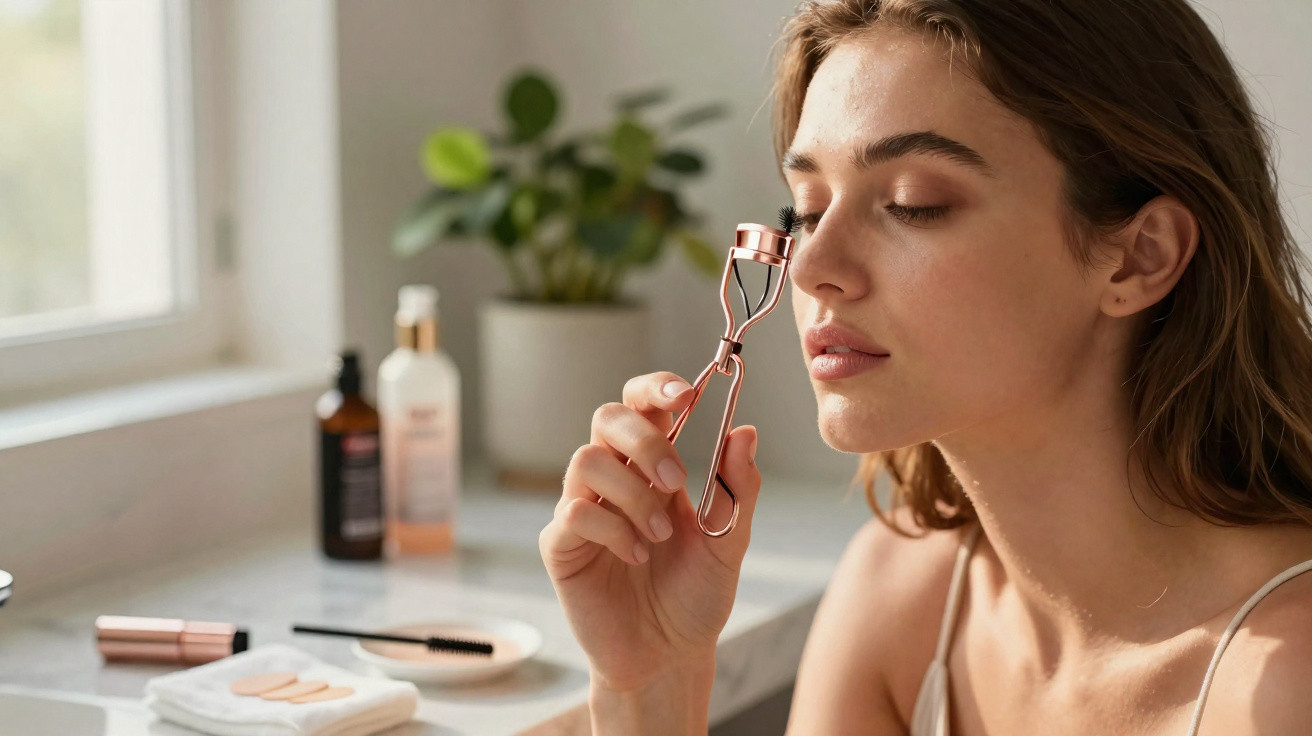
That same scene plays out every time: a slightly sleepy face stares back from the bathroom mirror, while one hand holds that small metallic instrument of torture supposedly capable of creating Bambi lashes. Your fingers are still a little unsteady from coffee, your phone is vibrating somewhere in the background, and then comes the decision: do I squeeze or not? Many of us know the horror stories - snapped hairs, tiny gaps along the lash line, that sharp tug when the curler will not release the delicate tips. Yet there it is every morning: innocent-looking, yet dangerous. Perhaps the truth lies somewhere between panic and professional routine. The simplest way to use your eyelash curler without pulling out a single lash starts much earlier than most people think.
Why eyelash curlers are so often underestimated
We constantly talk about mascaras, serums and lash lifts, but the eyelash curler tends to be overlooked in the make-up bag. Yet this inconspicuous tool often determines whether your eyes look tired or awake. Anyone who has used one properly knows the effect: the eye appears more open, the gaze looks clearer, more alert and perhaps even a little more curious. Still, many people treat the curler as a thrill-seeking gadget for occasional use rather than the precise beauty tool it is.
Perhaps that is because hardly anyone really explains how to use it without fear. We have all seen those brief TikTok clips where someone gives it three clicks, laughs for a moment - cut - and every lash is perfectly in place. What is missing is the split second in which you wonder: “But what if I squeeze too hard?” That is where uncertainty starts, and uncertainty then turns into a rigid, tense grip that crushes lashes instead of shaping them.
Let’s be honest: nobody sets aside ten minutes every day to practise calmly with an eyelash curler alone. Most people reach for it in a dimly lit bathroom, half dressed and half stressed. The curler ends up somewhere near the roots, gets one firm squeeze, perhaps a second, and that is it. That very attitude of ‘one quick squeeze, it will do’ is why so many lashes suffer. The simple method therefore begins with a shift in perspective: away from hurried squeezing and towards a controlled, gentle ritual that feels almost meditative.
The simplest truly lash-friendly eyelash curler method - step by step
The safest way to use your eyelash curler begins before you touch your eyes at all: make sure your lashes are clean and dry, then quickly inspect the tool. Are the rubber pads still soft? Is everything securely in place? If possible, sit down rather than trying to keep your balance while standing. Lift your chin slightly and look down into a mirror so you can clearly see your lash line. Bring the open curler to your eye, place the upper pad as close to the roots as possible - without catching your eyelid - then close it slowly until you feel slight resistance, and no more.
Now comes the part most people miss: rather than squeezing once with force, work in small, gentle stages. Count silently to five while applying light pressure at the roots, release the curler, move it about half a centimetre towards the tips, then repeat the gentle squeeze. This shapes the lash into a natural curve rather than bending it at a 90-degree angle. Avoid sudden movements and frantic clamping. The aim is an even curl and the sensation that you are guiding your lashes, not forcing them.
The most common mistake is using it on mascara-coated lashes because “the curl lasts better”. That is the surest way to lose hairs, since mascara makes lashes stiff and more likely to break under pressure. The second common mistake is positioning the curler incorrectly and gripping too far along the middle of the lashes. This creates that odd, visibly angular result with a distinct bend. And yes, mistake number three matters too: releasing it too quickly out of fear, leaving lashes trapped between the metal and rubber. All of this happens because of stress, rushing and the urge to get the whole thing over with as quickly as possible.
There is one very matter-of-fact truth that many people do not want to hear: lashes grow back, but slowly. Every pulled-out gap remains visible for weeks, and every small mishap is frustrating far longer than the curl lasts. Anyone who has had one or two bad experiences with a curler often avoids it altogether afterwards - and misses out on a tool that, when used correctly, is much gentler than its reputation suggests. The simplest method is therefore not the fastest one; it is the one in which you reduce the pressure and take control. Once you understand that this is delicate work rather than a feat of strength, the fear of pulling lashes out disappears too.
Small details that make all the difference - and save your lashes
The real magic lies in the details that seem insignificant. Warming the eyelash curler for two or three seconds with a hairdryer on a low setting can enhance the curl, as long as the metal is not hot but merely slightly warm. The curling process then feels more like gentle shaping than pinching. Always position the curler at the roots first, breathe out once and then close it lightly. No straining and no clenched teeth. Think of a handshake rather than a vice. The pressure should be noticeable, but never aggressive.
If lashes have ever got caught in your curler, you will know how unpleasant that moment feels. The instinct is to fling it open quickly, which only makes matters worse. Instead, stay calm, open the curler slightly and tilt it forwards by the smallest amount so the hairs can slide free on their own. Old, hardened rubber pads are a frequent cause of this, as they trap lashes instead of cushioning them. If you use a curler every day, replace the pads regularly rather than waiting until grooves appear. Let’s be honest: hardly anyone does this in time, and that is exactly where the drama begins.
A make-up artist I spoke to about the subject summed it up dryly:
“The eyelash curler is like a little stage technician - you only notice how important it is when something goes wrong.”
To ensure your stage technician does not become a saboteur, a short mental checklist helps:
- Always curl lashes before mascara, never afterwards.
- Hold the curler steady; do not wave it around in mid-air.
- Use brief stages of pressure: roots - middle - tips.
- Replace rubber pads as soon as they seem hard or cracked.
- When in doubt, use too little pressure rather than too much.
Why this simple eyelash curler method changes your whole routine
This technique is about more than a few curved hairs. It is a small morning ritual in which you can choose between force and care. Anyone who treats their lashes as something that simply has to cooperate will be rougher than necessary. Those who opt for the gentle, step-by-step approach soon notice that there is no more tugging, no anxious moment, no “I hope nothing gets pulled out”. Instead of drama, there is a calm sequence of actions that eventually feels as familiar as brushing your teeth.
Many people say that using an eyelash curler more consciously even changes the pace of their whole make-up routine. Not slower, but more focused. Cleanse first, shape next, then apply mascara. No more panicked reach for the curler when mascara is already half dry. And yes, at first it may feel excessive, almost as though you are scheduling an appointment with your own lash line. But after one or two weeks of consistent use, the reflection in the mirror usually speaks clearly: lashes that appear fuller and more even, no bare spots and less breakage.
We all know that moment of standing in front of the mirror and wondering whether we are doing our own face a favour or merely making it ‘fit for purpose’. At its heart, the simplest way to use a curler without harming your lashes is a small act of respect for these fine hairs that shape our expression so strongly. Once you have absorbed that, you will no longer see the curler as a potential torture device, but as a quiet ally for bright, awake-looking eyes - without tears, losses or horror stories to tell your friends later.
| Key point | Detail | Benefit for the reader |
|---|---|---|
| Gentle, staged pressure rather than forceful squeezing | Lightly press at the roots, middle and tips for only a few seconds each time | Reduces lash breakage and pulling, while creating a natural curl |
| Work only with clean, dry lashes | Never use it over mascara-coated, stiff lashes, and check rubber pads regularly | Protects lash structure and prevents painful trapping incidents |
| Keep a steady posture and clear mirror position | Sit down, look down into the mirror and keep your chin slightly raised | Offers more control, less slipping and a markedly lower risk of tugging |
FAQ:
Question 1: Won’t an eyelash curler inevitably pull out my lashes?
No. Lashes are mainly pulled out when too much pressure is used, when working on mascara-coated hairs or when the rubber pads are old and hard. With gentle, staged use, the curler is lash-friendly.Question 2: Should I warm the eyelash curler before using it?
Gentle warming can improve the curl, provided the metal is only lukewarm. Warm it briefly with a hairdryer, test the temperature on the back of your hand and only then bring it to your eye.Question 3: How often should I replace the rubber pads?
Anyone who uses the curler almost every day should replace the pads every few months, or as soon as grooves, hardening or discolouration appear.Question 4: Why must I not use the curler after mascara?
Mascara makes lashes stiff and more brittle. Under pressure, they can break more easily or be pulled out completely, particularly close to the roots.Question 5: What should I do if lashes do get caught in the curler?
Stay calm, open the curler slowly and only slightly, tilt it forwards and give the lashes time to slide free. Do not snap it open, as that could cause further damage.









Comments
No comments yet. Be the first to comment!
Leave a Comment